

Fototag – Photography WordPress Theme
/Year
Introduction: Showcase Your Art with Elegance
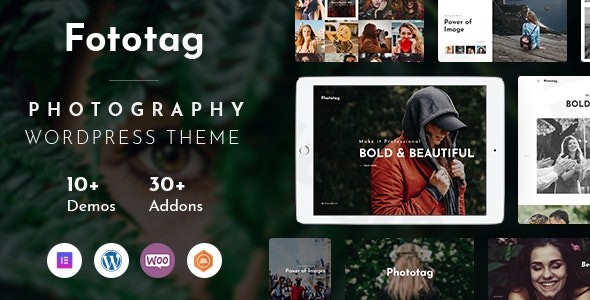
The Fototag Photography WordPress Theme is a timeless and elegant solution crafted specifically for professional photographers, photo studios, and creative agencies. Designed by RadiusTheme, its core philosophy centers on a clean, modern aesthetic that ensures your visual content — be it stunning portfolios, intricate galleries, or client projects — takes center stage. This theme is ideal for anyone looking to create a sophisticated online presence that prioritizes visual storytelling and user experience.
Key Features: Design, Layout & Performance
Fototag stands out with a comprehensive suite of features tailored to meet the demanding needs of visual artists, focusing on both stunning design and robust performance.
Design & Layout Options
Fototag provides exceptional flexibility for visual presentation:
- Multiple Stunning Demos: Choose from 10+ professionally designed homepage layouts, importable with a single click, providing a quick start for various photography niches.
- Specialized Galleries & Portfolios: Beyond homepages, the theme offers 6 distinct gallery/portfolio layouts, including popular grid and masonry styles, specifically optimized to showcase your images beautifully.
- Diverse Content Layouts: It also includes 3 engaging blog layouts and dedicated team layouts to introduce your staff or collaborators, ensuring every aspect of your site aligns with a professional visual brand.
- Dynamic Visuals: Integration with 5+ slider options, including compatibility with the powerful Slider Revolution plugin (often included), allows for dynamic and engaging hero sections and image showcases. A “Dynamic Page Header” further enhances visual control.
Customization Capabilities
Personalizing Fototag to match your unique brand is intuitive and powerful:
- Elementor Page Builder Integration: At its heart, Fototag leverages the popular Elementor Page Builder with its intuitive drag-and-drop functionality. This allows you to create and customize virtually any layout without writing a single line of code, offering unparalleled design freedom.
- WordPress Live Customizer & Admin Panel: Beyond Elementor, the theme integrates with the WordPress Live Customizer, enabling real-time previews of your changes. A powerful admin panel, powered by Redux Framework, provides granular control over theme options.
- Unlimited Branding Potential: Take advantage of unlimited color combinations to match your brand palette perfectly. A wide array of Google Web Fonts, including specific fonts like Poppins, Josefin Sans, and Roboto, offers diverse typographic choices to set the tone for your content.
Performance & SEO Features
Fototag is built with modern web standards to ensure your site is not just beautiful, but also fast and discoverable:
- SEO Friendly: The theme is described as SEO friendly, implying clean code markup and a structure that search engines can easily crawl and index, helping your portfolio rank higher.
- Performance Optimized: It’s designed for performance optimization, ensuring quick loading times crucial for image-heavy photography sites.
- Responsive & Cross-Browser Compatible: Fototag is fully responsive and mobile-friendly, adapting seamlessly to all screen sizes and devices. It also supports all modern browsers (Chrome, Safari, Firefox, IE11+), guaranteeing a consistent user experience.
Installation & Demo Import Guide
Setting up your Fototag-powered photography website is a straightforward process, even for beginners.
1. Install and Activate the Fototag Theme
- Download the Theme: Obtain the Fototag theme files from your purchase source (e.g., ThemeForest). You’ll typically receive a
.zipfile. - Upload to WordPress: Log into your WordPress dashboard, navigate to Appearance > Themes, and click “Add New” at the top.
- Upload Theme: Click “Upload Theme”, choose the Fototag
.zipfile from your computer, and click “Install Now”. - Activate: Once installed, click “Activate” to make Fototag your active theme.
2. Install Required Companion Plugins
Upon activation, Fototag will likely prompt you to install a set of recommended or required plugins for full functionality.
- Follow On-Screen Prompts: Look for a notification bar at the top of your dashboard (e.g., “This theme requires the following plugins…”) and click “Begin installing plugins”.
- Install & Activate: Select all listed plugins (e.g., Elementor, Slider Revolution, Contact Form 7, WooCommerce, Yoast SEO) and choose “Install” from the bulk actions dropdown. After installation, repeat the process to “Activate” them.
3. One-Click Demo Import
Fototag’s one-click demo importer is a standout feature, allowing you to quickly replicate one of the beautiful pre-designed layouts.
- Access Demo Importer: After installing and activating necessary plugins, navigate to the theme’s specific demo importer section in your WordPress dashboard. This is often found under Appearance > Import Demo Data or a similar menu item provided by the theme.
- Choose Your Demo: Browse the available 10+ homepage demos and select the one that best suits your vision.
- Start Import: Click the “Import” button. Acknowledge any warnings about importing content, and proceed.
4. What to Expect After Demo Import
The demo import process will populate your site with content, layouts, and settings from the chosen demo.
- Pages & Posts: You’ll find pre-designed pages (e.g., Home, About, Gallery, Contact) and sample posts.
- Menus: Navigation menus will typically be set up, though you may need to adjust them to your preference under Appearance > Menus.
- Widgets: Sidebar and footer widgets will often be pre-configured.
- Content Replacement: Remember that this content is for demonstration purposes. You’ll need to replace it with your own images, text, and portfolio pieces.
- Potential Pitfalls: For large demo imports, ensure your server has sufficient resources (e.g., PHP memory limit of 512MB or greater, PHP execution time). If the import fails or times out, consult your hosting provider or the theme documentation.
Customization Guide: Branding & Layout
Fototag empowers you to personalize every aspect of your website, ensuring it truly represents your brand.
Using the WordPress Customizer & Admin Panel
Your primary tools for customization will be the WordPress Live Customizer (found under Appearance > Customize) and Fototag’s dedicated Admin Panel (powered by Redux Framework, usually found as a top-level menu item or under Appearance in your dashboard).
- Real-time Previews: The Live Customizer allows you to make changes to global settings like colors, typography, and site identity and see them instantly before publishing.
- Granular Control: The Admin Panel offers deeper control over theme-specific settings, performance options, and more advanced layout configurations.
Changing Colors, Fonts, and Logos
- Colors: Within the Customizer or Admin Panel, you’ll find extensive color options. You can set global primary, secondary, and accent colors, as well as specific colors for elements like text, links, and backgrounds, leveraging the unlimited color combinations.
- Typography: Access font settings to choose from a vast library of Google Web Fonts. You can define font families, sizes, weights, and line heights for headings, body text, and other elements, ensuring consistent brand typography (e.g., Poppins, Josefin Sans, Roboto).
- Logo: Upload your brand logo and favicon through the Site Identity section in the Customizer. You can often specify different logos for regular and sticky headers.
Customizing Header, Footer, and Page Layouts
- Dynamic Page Header: Utilize the theme options to configure your “Dynamic Page Header,” potentially offering various layouts or styling options.
- Elementor for Page Content: For the main content of your pages, including most custom layouts, you’ll use the Elementor Page Builder. Open any page with Elementor to drag-and-drop elements, customize sections, columns, and widgets, and build unique visual narratives.
- Homepage & Blog Page Setup: After demo import, navigate to Settings > Reading to select your static homepage and posts page (blog).
- Menus: Go to Appearance > Menus to create and manage your primary navigation, footer menus, and any other menu locations provided by the theme.
- Child Theme: For more advanced customizations, such as adding custom CSS or modifying template files, Fototag includes a child theme. Always use a child theme to ensure your changes are preserved during theme updates.The customization experience with Fototag is highly intuitive, especially with Elementor’s visual builder. It provides a robust framework that allows both beginners and experienced users to create a unique and professional online presence.
FAQ & Troubleshooting
Q: Is Fototag compatible with Elementor and Gutenberg?
A: Yes, Fototag is fully compatible with both the Elementor Page Builder for drag-and-drop page creation and the native WordPress Block Editor (Gutenberg), allowing you to choose your preferred content editing method.
Q: Does Fototag support WooCommerce for online stores?
A: Absolutely! Fototag offers full WooCommerce integration, enabling professional photographers and artists to easily set up an online store to sell prints, photography services, or digital downloads directly from their website.
Q: Does the Fototag theme support child themes?
A: Yes, the Fototag theme comes with a child theme included. Using a child theme is highly recommended for any custom modifications to your site’s code or styling, as it ensures your changes are preserved when the main theme receives updates.
Q: What are the recommended server requirements for Fototag?
A: While Fototag is tested up to WordPress 5.8 (implying ongoing compatibility with newer versions due to recent updates), for optimal performance, it is recommended to use PHP version 7.4.x or greater, a WordPress memory limit of 512 MB or greater, and MySQL version 5.6 or greater or MariaDB version 10.0 or greater.
Q: How do I import a demo in Fototag, and what if it fails?
A: To import a demo in Fototag, navigate to the theme’s One-Click Demo Importer section in your WordPress dashboard (typically under Appearance > Import Demo Data), select your desired layout, and click “Import”. If the import fails or looks different from the demo site, it’s often due to insufficient server resources (e.g., PHP memory limit, execution time). Contact your hosting provider to adjust these settings, or consult the official theme documentation for specific troubleshooting steps.
Conclusion: Your Vision, Beautifully Displayed
The Fototag Photography WordPress Theme is a powerful, elegant, and highly functional choice for anyone serious about showcasing visual content online. Its dedication to a clean, modern aesthetic, combined with robust customization options via Elementor and the WordPress Customizer, makes it a standout in the photography theme niche.Fototag’s strength lies in its specialized design features, including a wealth of pre-built homepage, gallery, and portfolio layouts, which significantly reduce development time for photographers and creative agencies. Its deep integration with Elementor provides unparalleled design flexibility, while WooCommerce compatibility opens doors for direct sales of prints and services. Furthermore, its SEO-friendly and performance-optimized architecture ensures your beautiful work reaches a wider audience.For professional photographers, visual artists, and creative agencies seeking a dedicated platform to highlight their work with style, functionality, and ease of use, Fototag is an excellent choice. It offers a sophisticated foundation that allows your visual artistry to truly shine.
I. Download Limits & Account Benefits
- Free Downloads: Each email address receives 3 downloads per day for free products
- Upgrade Benefits: Purchase any paid product to increase your daily download limit by 3 for each paid product
- No Account Required: You can download immediately by receiving the download link via email
- Account Recommended: Create an account for easier access to your order history and direct update downloads
II. Understanding GPL vs Official Versions
Important: The products available on WPPick are GPL-licensed versions, which differ from official developer versions. Before purchasing, please read our comprehensive guide: Understanding GPL & Official Differences at WPPick
Key Points:
- GPL versions may not include premium support from original developers
- Updates may be delayed compared to official releases
- Some premium features might have limitations
- Always consider your specific needs and support requirements
III. Support & Assistance
We’re here to help through multiple channels:
- Email Support: Direct email assistance for all inquiries
- Live Chat: Real-time support during business hours
- Comprehensive Documentation: Detailed guides and tutorials
IV. Order Tracking
Access your complete purchase history and download links anytime: Order History
V. Account Access
New to WPPick? Login or Create Account to manage your downloads and orders efficiently.
VI. Refund Protection
We stand behind our products with a clear refund policy. Review our terms: Refund Policy
VII. Privacy & Security
Your data security is our priority. Learn how we protect your information: Privacy Policy
VII. Terms of Service
Understanding our service terms ensures a smooth experience: Terms of Use
Quick Tips for Best Experience
- Verify Compatibility: Check plugin/theme compatibility with your WordPress version
- Backup First: Always backup your site before installing new plugins or themes
- Test Environment: Consider testing on a staging site first
- Stay Updated: Regularly check for updates in your account dashboard
- Read Documentation: Review any included documentation for optimal setup
Need Help?
If you have questions about downloads, licensing, or need technical assistance, don’t hesitate to contact our support team. We’re committed to ensuring you have the best possible experience with WPPick products.
Ready to get started? Your download adventure begins with just one click!
- Text Domain Issue
- Fototag Core and Revolution Slider